Titrations of Blueberries
1. The night before you run samples remove bags from freezer and put in a lug on the counter. You can do about 12 in two hours
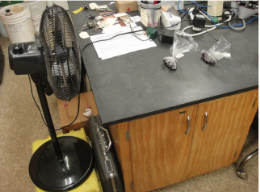
2. 2 hours before you start put the baggies on the counter. Then one hour before you run the samples put the fan on the baggies.
3. Don’t open baggies until you are ready to start. Humidity hurts the samples
4. Check pH meter. Leave it in the 7 buffer to store it (yellow). Check temp dial is at 21. Standardize pH meter (keep off-left knob). Take out meter and rinse with distilled water then put it in the yellow 7 and turn on (left knob). Adjust with the right knob until the line reads 7. Turn left knob back to standby and then rinse with distilled water and put it in the red 4. Turn it on and then adjust with middle left knob to 4. Rinse again and recheck the 7 buffer. While working on samples you can store it in distilled water. Really important to check pH meter before you open samples! Recalibrate pH every 4 hours if working samples for a full day.

5. Aggitate/mix the carboy of NaOH. Put NaOH in squeeze bottle-lossen cap to dispense from carboy but make sure it is tight afterwards.

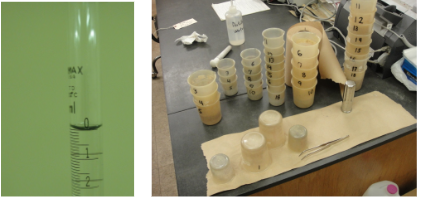
6. Fill glass titrating rod to top and open to make sure meniscus is at 0. There is a slow leak so before you run the sample make sure it is filled up.
7. Set out 5 large plastic beakers and 5 small plastic beakers
8. Open the first fruit sample bag
9. Tare a small plastic beaker on the scale and then add fruit with a tweezers (average size and full color) until the scale reads 24 g. (reads to .1 g). A range of 24-26g weight is okay. Then count the berries and write down these data points. Close up the remaining fruit in the baggie. These will go back in the freezer.

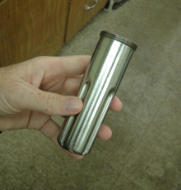
10. Put the berries in the stainless steel cup and crush the berries with a ceramic pestle
11. Get light meter and look through it at a light and adjust eye piece so that they are clear and readable
12. Put the light meter on the counter and open up the plastic cover and put a drop of juice on it. Close plastic lid and look through it at a light. Read the number where the blue and color back up against each other. This is the soluble solids (brix number)
13. Rinse the pestle with distilled water over the stainless steel cup. Also rinse plastic beaker if there is any juice in there into the cup. Then add water to the top of the ridges. (this makes sure all the samples are the same)
14. Attach the cup to the hymogenizer…make sure it is screwed on tight. Set the timer to 1 minute-just to the right of the 0 and then turn on.

15. Dump the juice in a large plastic beaker and rinse any juice off the blade or stainless steel cup into the beaker. Fill the beaker to 100mL
16. Rinse the pH meter is needed and put in the large beaker or juice. Turn on the pH-it drifts a bit so read after about 20 seconds. Range 2.9-3.6
17. Remove pH meter and put stir bar in cup. Turn on stir mechanism not too high and put the pH meter back in the sample.
18. Check the NaOH reading is set at 0. Then turn so it is over the juice. Titrate (add NaOH) until the pH meter reads 8.1. Turn knob so that a slowish constant drip of NaOH happens over the cup. Watch the pH meter. It’s buffered to 5.5 then zooms up. Close knob when it is at 8.1. Read meniscus line to .1 mL. Range is 10-30mL of NaOH. Record number on data sheet.
19. Turn the pH to standby and clean up. Throw sample in a bucket not down drain
20. Do four reps for each sample